
A vapor barrier installed on the wrong side of an insulated wall can trap moisture where you cannot see it. In New England, where long heating seasons meet humid summers, proper vapor barrier placement is a building-envelope decision, not a one-size-fits-all material choice. The right approach protects framing, preserves insulation performance, and helps avoid mold, rot, and inspection problems years after construction is complete.
The first question is not simply, “Where does the plastic go?” It is: How will this particular wall, roof, floor, or crawl space dry if it gets wet? Every building assembly needs a realistic drying path, especially in homes exposed to snow, wind-driven rain, indoor humidity, and major seasonal temperature swings.
Vapor Barrier Placement Starts With Moisture Control
A vapor barrier limits the movement of water vapor through an assembly. It is different from an air barrier, which stops air leakage. That distinction matters because moving air can carry far more moisture into a wall or ceiling cavity than vapor diffusion alone.
For example, warm indoor air leaking through gaps around wiring, recessed lights, and framing can reach a cold surface inside a wall. Once that air cools, moisture can condense. Installing polyethylene sheeting without air sealing the assembly may not solve that problem. In some cases, it can make drying more difficult.
Building professionals often use the broader term vapor retarder because materials allow different amounts of vapor movement. A Class I vapor barrier, such as polyethylene sheeting, is highly resistant to vapor. Kraft-faced fiberglass, certain paints, and smart vapor retarders allow more controlled drying. The right material depends on the climate zone, wall design, insulation type, and local code requirements.
Where Does a Vapor Barrier Go in New England Walls?
In a heating-dominated New England climate, vapor control is usually located toward the interior, or warm-in-winter, side of an insulated wall. That basic rule reflects the goal of limiting indoor moisture from reaching cold exterior sheathing during winter.
But “toward the interior” does not always mean stapling 6-mil plastic directly behind drywall. Modern high-performance walls can include exterior rigid insulation, rain-screen details, vapor-open weather-resistive barriers, and dense-pack or spray foam insulation. Those components change the temperature and drying behavior of the wall.
A wall with enough continuous exterior insulation keeps the sheathing warmer in winter. That reduces condensation risk and may allow a more vapor-open interior finish. On the other hand, a wall with little exterior insulation, high indoor humidity, and a low-permeance exterior layer may need a more deliberate interior vapor-control strategy.
This is why builders and remodelers should avoid copying a detail from another project without reviewing the whole assembly. A vapor barrier that works in a simple new-construction wall may be a poor fit for a historic renovation with older framing, existing sheathing, and limited ability to dry.
Kraft Facings and Interior Vapor Retarders
Kraft-faced fiberglass is commonly installed with the facing toward the conditioned interior. The facing functions as a vapor retarder when seams, edges, and penetrations are properly detailed. It is not an air-sealing system, so air sealing should happen separately at the exterior sheathing, interior drywall plane, or another continuous location in the assembly.
For many wall assemblies, a variable-permeance or “smart” vapor retarder is a practical alternative to polyethylene. It restricts vapor movement during cold weather but becomes more open when conditions support drying. That added drying potential can be valuable in New England homes, particularly when renovating walls with materials that may already hold some moisture.
Crawl Space Vapor Barrier Placement
Crawl spaces are one of the clearest cases for vapor barrier placement because exposed soil continually releases moisture. The vapor barrier belongs on the crawl space ground, not between the floor joists as the only moisture-control measure.
For an encapsulated crawl space, durable polyethylene is installed continuously across the ground, lapped and sealed at seams, and extended up foundation walls. The crawl space is then brought inside the home’s conditioned envelope through appropriate wall insulation, air sealing, and conditioning or dehumidification as needed.
Putting fiberglass between floor joists while leaving bare earth below often creates a cold, damp crawl space. The insulation can absorb moisture, sag, and lose performance, while the wood framing above remains exposed to high humidity. Floor insulation may still be appropriate in a vented crawl space under certain designs, but it should not substitute for ground moisture control.
Details matter here. The membrane must be durable enough for the intended use, sealed around piers and penetrations, and protected from damage. Foundation walls, rim joists, drainage conditions, and combustion equipment also need review before an encapsulation plan is finalized.
Basement Slabs and Foundation Walls Need Their Own Strategy
Below-grade spaces manage moisture differently from above-grade walls. Concrete can transmit moisture from the soil, so vapor protection beneath a new basement slab is critical. A properly installed under-slab vapor barrier helps keep ground moisture out of the finished basement and protects flooring materials from moisture-related failure.
Foundation walls also need a coordinated approach. Exterior waterproofing and drainage are the first line of defense against bulk water. Interior insulation and vapor control should not conceal an active foundation leak or drainage issue.
For finished basements, closed-cell spray foam or properly detailed rigid foam can provide insulation, air control, and significant vapor resistance against concrete walls. The assembly must still meet fire-protection requirements and local code provisions. In older basements, the right solution may begin with correcting exterior grading, gutters, and drainage before adding interior finishes.
Attics: Air Sealing Comes Before Vapor Control
Attic moisture problems are frequently blamed on missing vapor barriers, but uncontrolled air leakage is often the larger issue. Warm, humid household air can escape through ceiling penetrations and into a cold attic, where it condenses on roof sheathing. Frost, wet insulation, stained sheathing, and mold can follow.
Before adding attic insulation, seal top plates, plumbing and electrical penetrations, chimney chases, attic hatches, and recessed-light openings that are approved for contact with insulation. Then confirm that attic ventilation, roof design, and insulation depth work together.
In a vented attic, the ceiling plane is typically the thermal and air boundary. In an unvented roof assembly, insulation is placed at the roofline, and vapor-control requirements depend on the insulation method and amount of exterior versus interior R-value. Spray foam may be appropriate for some roof assemblies, but the design must account for roof sheathing drying potential and code-required ignition or thermal barriers.
Avoid Double Vapor Barriers
One of the most common moisture-control mistakes is creating a wall that cannot dry in either direction. This can happen when polyethylene is installed on the interior while the exterior side includes foil-faced rigid foam, a low-permeance membrane, or another highly vapor-resistant material.
A double vapor barrier does not always cause failure. The actual risk depends on insulation ratios, climate, indoor humidity, construction quality, and whether the materials began dry. Still, it leaves little margin for small leaks, construction moisture, or future water intrusion. A more forgiving assembly usually allows controlled drying to at least one side.
This concern is especially relevant during remodels. Before adding new insulation or an interior vapor retarder, identify what is already in the wall. Existing foil-faced board, exterior foam, old roofing materials, and multiple layers of painted finishes can all affect vapor movement.
Choose Materials Based on the Whole Assembly
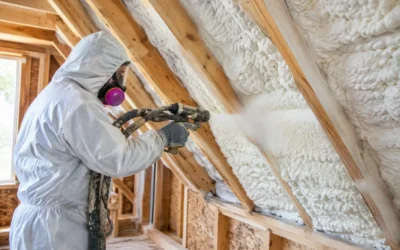
The best vapor-control material is often tied to the insulation system. Closed-cell spray foam offers high R-value per inch, air sealing, and low vapor permeability in one application. It can be a strong solution for rim joists, basement walls, compact roof assemblies, and complex framing where air leakage is a concern.
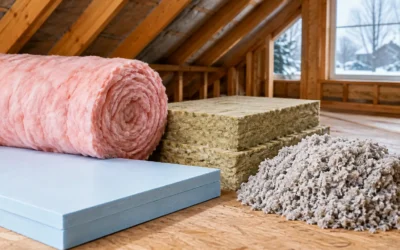
Open-cell spray foam is more vapor-open and may require an additional vapor-retarder coating or membrane in certain applications. Dense-pack cellulose can help limit airflow within cavities and provides excellent thermal performance, but it still needs a well-detailed air barrier and an assembly designed to manage moisture. Fiberglass and mineral wool are vapor-open insulation materials, so the surrounding air and vapor-control layers do much of the moisture-management work.
There is no universal winner. The right system balances R-value, air sealing, drying potential, budget, fire requirements, project access, and the condition of the existing structure.
Get the Details Right Before Covering the Walls
Vapor control is easiest to get right before drywall, flooring, or finishes conceal the assembly. For homeowners, that may mean asking whether the proposed insulation plan includes air sealing, moisture assessment, and a clear explanation of where the assembly can dry. For builders and remodelers, it means coordinating insulation details with framing, mechanical trades, exterior cladding, and local inspection requirements.
Colonial Insulation evaluates insulation and moisture-control decisions in the context of New England weather, the building’s existing conditions, and the performance goals of the project. A well-designed assembly does more than pass inspection. It helps keep rooms more consistent, reduces unnecessary energy loss, and protects the structure through winter cold and summer humidity.
Before choosing a vapor barrier, make sure the full wall, roof, floor, or foundation assembly has a place for moisture to go. That single question can prevent a hidden problem from becoming an expensive repair.