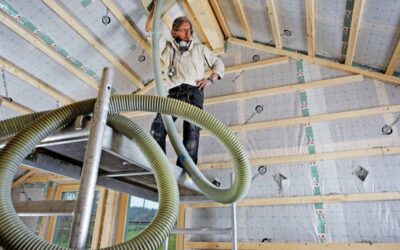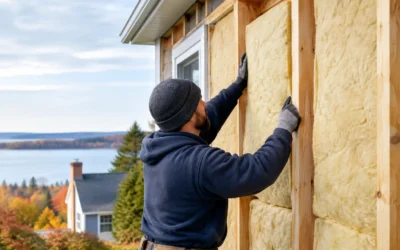

A cold floor over the garage, a bedroom that never matches the thermostat, and dust collecting near baseboards can all point to the same issue: uncontrolled air leakage. This residential air sealing project guide explains how New England homeowners, builders, and remodelers can identify leaks, prioritize repairs, and prepare a home for insulation that performs as intended.
Air sealing is not simply a matter of adding caulk wherever a draft is felt. A house moves air through hidden pathways created by framing, plumbing, wiring, attic penetrations, and transitions between old and new construction. The goal is to control that movement without trapping moisture or interfering with required ventilation and combustion safety.
Why Air Sealing Comes Before More Insulation
Insulation slows heat transfer. Air sealing reduces the movement of heated or cooled air through gaps in the building enclosure. Both are necessary, but insulation installed over major leaks can underperform because warm indoor air still escapes into the attic, walls, crawlspace, or garage-connected areas.
That distinction matters in New Hampshire, Massachusetts, Maine, and Vermont. During winter, warm interior air can carry moisture into cold building cavities. If that moisture condenses on roof sheathing, framing, or other cold surfaces, it can contribute to mold, wood damage, and ice dam conditions. In humid summer weather, uncontrolled air can also make rooms feel clammy and increase cooling demand.
For homeowners, a well-planned project often means fewer drafts, more consistent room temperatures, and lower heating and cooling costs. For builders and remodelers, it means a more predictable path to blower-door targets, energy-code compliance, and first-pass inspections.
Start With an Assessment, Not a Tube of Caulk
The most useful projects begin by locating the major leakage paths. A visual inspection can reveal obvious gaps, but it rarely tells the whole story. Air follows pressure differences, and many of the largest leaks are concealed behind insulation, knee walls, dropped ceilings, and utility chases.
A professional energy audit with blower-door testing creates controlled pressure inside the home and helps reveal where air is entering or leaving. This is especially valuable in older homes, additions, and renovations where several construction methods may meet in one building. Infrared imaging can also help identify missing insulation and temperature differences, though it works best when paired with air-leakage testing and an experienced evaluation.
During the assessment, look beyond the room that feels uncomfortable. A cold second-floor bedroom may be caused by an open chase in the basement, gaps around recessed lights in the attic, or leakage at the rim joist. Treating only the visible symptom can leave the main pathway untouched.
Common Locations for Air Leaks
The following areas deserve careful attention because they frequently connect conditioned living space to unconditioned areas or the outdoors:
- Attic hatches, pull-down stairs, recessed fixtures, plumbing stacks, wiring holes, and open wall-top plates
- Basement rim joists, sill plates, foundation penetrations, bulkheads, and utility entries
- Exterior doors, window rough openings, cantilevered floors, and porch or deck connections
- Duct boots, bath-fan housings, fireplace surrounds, chimney chases, and garage-to-house walls
Not every opening should be sealed with the same material. The correct approach depends on gap size, location, temperature exposure, fire-safety requirements, and whether the assembly must allow drainage or ventilation.
Build the Scope Around the House and the Project
A residential air sealing project should be tailored to the building, not copied from a generic checklist. An unfinished attic, for example, often receives the highest priority because it is a major exit point for heated air in winter. Air sealing at the attic floor can improve comfort throughout the home before new cellulose, fiberglass, mineral wool, or spray foam is installed.
In a renovation, sequencing is equally important. Seal accessible framing cavities and penetrations before drywall goes up. Coordinate with electricians, plumbers, HVAC contractors, and framing crews so that new holes are limited, sealed, and documented. This avoids opening finished surfaces later and helps keep the schedule on track.
For older homes, the work may need to be phased. Starting with the attic, rim joists, and obvious exterior penetrations often delivers meaningful results. Wall leakage can be more complex because dense-packed insulation, siding removal, or interior access may be needed to address it properly. The best next step depends on the home’s age, existing insulation, moisture history, and renovation plans.
Match Materials to the Detail
High-quality air sealing is a system of compatible materials, not a single product. Caulk is effective for narrow, stable gaps. One-component expanding foam can fill many irregular openings, while larger voids may require rigid material, backer rod, sheet goods, or carefully applied spray foam. Durable tapes and membranes can be appropriate at sheathing seams and transition details when installed on clean, properly prepared surfaces.
Fire and heat exposure require additional care. Openings around chimneys, flues, and certain heat-producing fixtures cannot be sealed with standard foam products. These details may require noncombustible materials and code-required clearances. Likewise, bath fans and kitchen exhaust need properly routed ducts that terminate outdoors, not simply sealed around an interior connection.
Professional crews also consider how a material will age. A quick patch that cracks, pulls away, or blocks necessary drainage is not a lasting repair. The goal is a durable air-control layer that works with the home’s insulation, moisture-management, and ventilation strategy.
Protect Indoor Air Quality and Moisture Control
Tightening a home changes how it breathes, but it should not make the indoor environment stale or unsafe. Air sealing reduces random leakage. Ventilation provides intentional fresh-air exchange where and when it is needed. Those are different functions.
Before sealing, evaluate combustion appliances such as furnaces, boilers, water heaters, and fireplaces. Atmospheric combustion equipment may need combustion-safety testing to confirm it drafts correctly after improvements are made. Carbon monoxide alarms should be installed and maintained in accordance with local requirements and manufacturer guidance.
Moisture management also deserves a practical review. Roof leaks, wet basements, crawlspace water issues, and disconnected bath ducts should be corrected before enclosing cavities with new insulation or foam. Air sealing can reduce moisture transport, but it cannot solve a bulk-water problem. In New England, careful detailing at foundations, rim joists, roofs, and vapor-control layers protects the building through long heating seasons and humid summer periods.
Verify the Results Before Closing Up
A project is stronger when it includes verification. On a finished home, post-work blower-door testing can confirm whether the most significant leakage has been reduced. During new construction or a major remodel, testing before drywall offers a valuable chance to correct missed details while they are still accessible.
Verification is not only about hitting a number. A low air-leakage result does not excuse blocked vents, poor attic insulation coverage, or an unaddressed moisture source. Review the complete building enclosure: air control, insulation continuity, water management, ventilation, and mechanical-system performance all affect comfort.
For contractors, documentation can be just as useful as testing. Photos of sealed penetrations, product records, and a clear scope help support inspection conversations and give clients confidence that critical work was completed behind finished surfaces.
When Professional Air Sealing Makes Sense
Homeowners can often handle minor weatherstripping and simple interior caulking. Larger work should be evaluated by a qualified insulation and building-performance contractor when it involves attic access, spray foam, combustion appliances, moisture damage, wiring penetrations, or a major renovation. These areas carry risks that are easy to miss from the living space.
Colonial Insulation approaches air sealing as part of the full building envelope, with recommendations based on the home’s construction, climate exposure, insulation needs, and project goals. That may mean targeted sealing before adding blown cellulose, a carefully detailed rim-joist treatment, or a coordinated approach for a new addition that needs to meet applicable code requirements.
A good project does not chase every tiny crack before addressing the pathways that move the most air. Start with a clear assessment, correct moisture and safety concerns, seal the largest leaks with appropriate materials, and verify the work where possible. The result is a home that feels more even from room to room and is better prepared for every New England season.