
A loose attic hatch can act like an open window on the ceiling during a New England winter. Warm air rises through the house, finds the unsealed opening, and escapes into the attic. When you seal attic hatch gaps correctly, you slow that airflow, protect the performance of your attic insulation, and make rooms below the hatch more comfortable.
This is a small building-envelope detail with an outsized effect. Homeowners often add more insulation after noticing cold bedrooms or high heating bills, but insulation alone cannot stop air from moving through gaps. A properly sealed and insulated hatch is part of the air barrier that keeps heated or cooled indoor air where it belongs.
Why attic hatch gaps cause drafts and energy loss
Your attic hatch sits at the boundary between conditioned living space and an unconditioned attic. In January, that attic may be near outdoor temperature. In summer, it can become intensely hot and humid. Any opening around the hatch gives air, heat, moisture, and sometimes attic dust a direct path into or out of the home.
The effect is strongest because of stack effect. As warm indoor air rises, it creates pressure near the top of the house. Air leaks at attic hatches, recessed lights, plumbing penetrations, and wall-top plates become exit points. Replacement air then enters through lower leaks around basements, rim joists, windows, and doors. The result can be cold floors, persistent drafts, uneven room temperatures, and heating equipment that runs longer than it should.
Air leakage also carries moisture. During cold weather, humid indoor air entering a cold attic can condense on roof sheathing or framing. One poorly sealed hatch will not necessarily create a moisture problem on its own, but it can contribute to the conditions that support frost, damp insulation, mold growth, and long-term roof-deck damage.
How to seal attic hatch gaps properly
The right approach depends on whether you have a simple lift-out panel, a knee-wall door, or pull-down attic stairs. The goal is the same in every case: create a continuous air seal at the perimeter and bring the hatch itself close to the insulation level of the surrounding attic floor.
Start with the opening, not just the cover
Remove the hatch and inspect the rough opening. Look for visible gaps between the framing and drywall, cracks in the ceiling finish, or unblocked cavities near the opening. These gaps should be air-sealed before weatherstripping goes on the hatch.
For small, stable gaps, a quality caulk may be appropriate. Larger irregular openings are often better sealed with low-expansion spray foam. Use the product carefully. Overfilling can make cleanup difficult, and high-expansion foam can distort lightweight materials. If wiring, chimney components, flues, or other heat-producing equipment are nearby, the sealing method must respect required clearances and fire-safety rules.
A professional assessment is worthwhile when the hatch area includes older wiring, recessed fixtures, ductwork, or signs of attic moisture. Air sealing is most effective when it accounts for the entire assembly rather than treating one visible crack in isolation.
Install continuous weatherstripping
Once the opening is sealed, apply durable closed-cell foam or rubber weatherstripping around the hatch frame where the cover makes contact. The seal should run continuously around all four sides, without compressed corners, breaks, or loose sections.
The weatherstripping needs enough compression to stop airflow, but not so much that the panel bows or becomes difficult to close. A common mistake is applying a thin strip to an uneven surface and assuming it will bridge every gap. If the frame is warped, damaged, or out of level, it may need to be repaired or faced with a smooth, solid surface first.
After installing the gasket, close the hatch and check for movement. A lift-out panel should sit firmly in place. A hinged hatch or knee-wall door should close tightly with a latch. If the cover can shift easily, air can still move past the gasket when pressure changes inside the house.
Insulate the hatch itself
Weatherstripping handles airflow at the edges. Insulation on the back of the panel slows heat transfer through the hatch. Without it, the hatch becomes a cold or hot spot in an otherwise well-insulated ceiling.
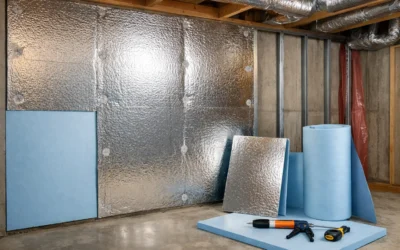
Rigid foam board is often an effective option for a standard attic panel because it provides meaningful R-value without adding excessive weight. The foam should be cut to fit the back of the cover and secured so it cannot fall into the living space when the panel is moved. Multiple layers may be used when clearance allows, but the hatch must still open safely and remain easy to handle.
For a typical New England attic, the hatch should be insulated to a level that is reasonably consistent with the surrounding attic floor. Exact targets vary by assembly, available space, and local code requirements. A thin piece of batt insulation taped to the hatch is usually not enough, particularly when it becomes compressed or falls out of position.
Keep loose-fill insulation out of the opening
If your attic contains blown cellulose or loose fiberglass, build a rigid insulation dam around the hatch opening. This keeps material from spilling into the house whenever the panel is lifted and preserves a clear path for safe access.
The dam should be high enough to contain the installed insulation depth, especially in attics upgraded to modern R-value levels. It should also be positioned so the hatch can be removed without scraping or dislodging insulation. This detail is simple, but it matters for both performance and practical maintenance access.
Pull-down stairs need a different solution
Pull-down attic stairs are more difficult to air-seal than a flat hatch because they have a larger perimeter, moving joints, and a folding ladder assembly. Weatherstripping around the stair frame is still necessary, but it is rarely enough by itself.
An insulated attic-stair cover or air-sealed box installed over the stairs from the attic side is usually the better solution. The cover should seal to the attic floor or framing around the stair opening and be removable for access. Some products are purpose-built, while others can be constructed as part of an air-sealing upgrade. The best choice depends on the available headroom, stair configuration, and insulation depth.
Avoid stuffing fiberglass batts over the stair assembly and calling it finished. Fiberglass slows heat flow, but it does not reliably stop air leakage, and loose material can interfere with safe operation. A dedicated cover provides a more dependable air barrier and makes the opening easier to use.
Common mistakes that limit performance
Many attic hatch repairs fail because they address only one part of the problem. Caulking the visible ceiling crack without weatherstripping the cover still leaves a perimeter leak. Adding insulation to the panel without sealing the frame creates a better-insulated draft path rather than an air barrier.
Other mistakes include using damaged hatch panels, skipping the latch on hinged doors, compressing weatherstripping until it fails, and burying attic access under loose-fill insulation. In older homes, it is also easy to overlook adjacent bypasses around plumbing stacks, electrical boxes, and interior partition walls. Those leaks can be just as significant as the hatch itself.
For builders and remodelers, hatch details should be completed before final insulation depths make access difficult. A defined access boundary, proper insulation dam, durable gasket, and inspection-ready hatch reduce call-backs and help the attic assembly perform as designed.
When a professional air-sealing assessment makes sense
A homeowner can often improve a straightforward hatch in an afternoon. However, persistent drafts, ice dams, uneven temperatures, visible attic frost, or unusually high utility costs may point to broader air leakage. In those cases, a whole-home energy audit can identify where the building is actually losing air rather than relying on guesswork.
Colonial Insulation evaluates attic hatches as part of the larger building envelope, including insulation levels, bypasses, ventilation conditions, moisture risks, and the needs of the home or renovation project. That approach helps ensure a hatch repair supports lower energy use and reliable comfort instead of becoming an isolated fix.
Before the next cold snap, stand beneath your attic access and feel for a temperature change or draft around the edges. That small check can reveal one of the most affordable opportunities to improve comfort at the top of the house.