
A wall can look perfectly sound while moisture is collecting inside it every cold night. That is what makes exterior-wall condensation so costly: by the time paint peels, trim swells, or a musty odor appears, the problem may already involve wet insulation, decaying sheathing, or mold growth. To stop condensation in exterior walls, you need to control the path moisture takes through the building assembly – not simply add more insulation wherever there is room.
For homes and projects in New Hampshire, Massachusetts, Maine, and Vermont, the challenge is especially acute. Winter air is cold and dry outside while indoor air is warm and moisture-laden. That difference pushes heat and moisture toward exterior surfaces, where they can reach a temperature cold enough for water vapor to become liquid.
Why Exterior Walls Develop Condensation
Condensation occurs when moist air contacts a surface that is below its dew point. A cold drink sweating on a summer day is an easy example. In a wall, the cold surface may be the back of exterior sheathing, the face of a vapor retarder, a nail, or an uninsulated section of framing.
The key point is that most wall moisture problems are caused by air leakage, not slow vapor movement through painted drywall. Warm indoor air can carry a significant amount of water vapor. When that air escapes through gaps around electrical boxes, top plates, rim joists, window openings, plumbing penetrations, or poorly sealed drywall, it can deposit moisture deep in the wall cavity.
Insufficient insulation makes the problem worse because it allows interior wall surfaces and hidden structural materials to get colder. Thermal bridging through studs, headers, steel framing, and uninsulated transitions creates localized cold spots even when the wall cavity appears insulated.
Bulk water must also be ruled out. A roof leak, missing flashing, failed siding detail, or leaking window can wet a wall in ways that look like condensation. The repair strategy is completely different, so identifying the source matters before insulation work begins.
The Right Way to Stop Condensation in Exterior Walls
Effective moisture control comes from a coordinated wall system. Air sealing, insulation, vapor control, drainage, and indoor humidity management all have a role. Which measure deserves priority depends on the wall type, its existing layers, and whether the work is a renovation or new construction.
Start by finding the moisture pathway
A professional inspection or energy audit can reveal where heat and air are moving through the enclosure. Thermal imaging, blower-door testing, moisture readings, and a careful visual assessment help distinguish a broad insulation problem from a concentrated leak at one location.
Clues matter. Frost on nails in an attic or wall cavity often points to indoor air leakage. Condensation around windows may indicate high indoor humidity, poor air sealing, cold glass, or a combination of all three. A damp wall after wind-driven rain suggests exterior water management before any interior insulation work is considered.
For builders and remodelers, this evaluation is also a way to avoid expensive callbacks. A wall assembly should be reviewed as a complete system before it is closed up, particularly where new additions meet older construction.
Air-seal before adding insulation
Air sealing is often the highest-value step because it stops warm, moist interior air from reaching cold hidden surfaces. Common leakage locations include the drywall-to-top-plate connection, bottom plates, exterior wall penetrations, recessed fixtures, plumbing chases, band joists, and intersections between walls and ceilings.
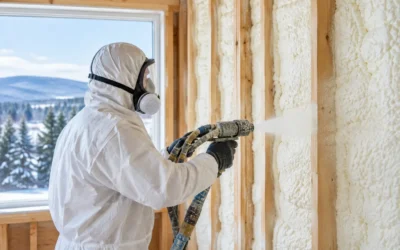
The appropriate material depends on the opening and assembly. Caulk and gaskets work well at smaller, accessible joints. Carefully installed spray foam can seal irregular gaps and penetrations while providing insulation. Taped sheathing, sealed housewrap details, and continuous exterior air barriers are especially valuable in new construction.
Do not assume fiberglass alone will stop airflow. Fiberglass can provide effective thermal resistance when it is properly installed, but it does not function as an air barrier. If air can move through or around it, moisture can move with that air.
Keep the wall cavity warm enough
Insulation reduces heat loss and raises the temperature of interior-side wall materials. That lowers the likelihood that moisture will reach its dew point inside the assembly. But R-value is only part of the equation. Compression, gaps, voids, and misalignment can significantly reduce real-world performance.
In cold New England climates, continuous insulation on the exterior side of wall sheathing can be particularly effective. It keeps the sheathing warmer during winter and reduces thermal bridging through framing. The required thickness depends on climate zone, wall construction, and the type of insulation used. This is one reason exterior insulation details should be planned carefully during siding replacement, major renovations, and new builds.
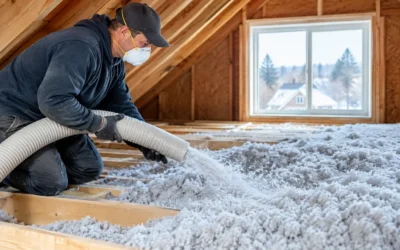
Dense-pack cellulose, fiberglass, mineral wool, and spray foam can all be appropriate choices in the right assembly. Mineral wool is valued for moisture tolerance, fire resistance, and sound control. Cellulose can fill irregular cavities effectively. Fiberglass remains a practical option when paired with a reliable air barrier. Closed-cell spray foam provides air sealing and high R-value in limited space, while modern HFO spray foam options can support high-performance assemblies with a lower global-warming impact than older formulations.
No insulation material fixes a wall that is leaking from the exterior or allowing uncontrolled interior air into the cavity. Installation quality and assembly design are what turn a product into a moisture-control solution.
Use vapor control in the correct location
A vapor retarder is not a universal plastic sheet installed on the interior of every wall. In fact, placing the wrong low-permeance material in the wrong location can trap moisture and limit drying.
Cold-climate walls generally need to limit wintertime vapor movement from the interior, but they also need a reasonable ability to dry when incidental moisture gets in. The correct vapor-control approach depends on exterior insulation levels, cladding, sheathing type, interior finishes, and local code requirements. Painted drywall, vapor-retarder paint, smart membranes, kraft facings, and certain foam products all perform differently.
For example, an older wall being insulated from the interior may need a different strategy than a new wall with continuous exterior insulation. A wall with brick veneer has different drying behavior than one with vinyl siding over a ventilated drainage plane. This is where copying a detail from an online forum can create a problem instead of solving one.
Manage indoor humidity during winter
Even a well-built wall can be stressed by excessive indoor humidity. Cooking, long showers, unvented combustion appliances, aquariums, firewood drying indoors, and oversized humidifiers can all raise moisture levels. The colder it gets outside, the less indoor humidity a typical home can tolerate without condensation risk.
Bathroom fans should exhaust outdoors, not into an attic or soffit. Kitchen ventilation should capture moisture at the source. Clothes dryers need properly connected exterior vents. If a home is tightly air-sealed, balanced mechanical ventilation may be needed to maintain healthy indoor air while controlling moisture.
This does not mean New England homes should be made uncomfortably dry. It means humidity should be monitored and adjusted to the season, window performance, and building enclosure. Condensation on window glass is often an early warning that indoor moisture levels or air leakage deserve attention.
Existing Walls Need a Different Approach Than New Construction
New construction offers the best opportunity to establish a continuous air barrier, drainage plane, insulation layer, and vapor-control strategy before finishes are installed. Details at windows, roof-to-wall transitions, cantilevers, and foundation connections should be resolved on paper and verified in the field.
Existing homes require more caution because hidden materials and past repairs can change how the wall handles moisture. Drilling holes and dense-packing an empty wall cavity may improve comfort, but the exterior sheathing, siding condition, and interior vapor layers should be considered first. Adding interior spray foam to a historic wall, for instance, can alter its drying potential and should not be treated as a one-size-fits-all upgrade.
When siding is being replaced, exterior air sealing and continuous insulation may offer a durable path to warmer sheathing and fewer thermal bridges. When work is limited to the interior, targeted air sealing and an assembly-specific insulation plan may be the better fit. Budget, access, architectural details, and local code requirements all influence the decision.
Signs You Should Act Before Damage Spreads
Persistent window condensation, cold or damp-feeling exterior walls, peeling paint, moldy odors, staining near outlets, and noticeably drafty rooms all justify a closer look. So does recurring ice buildup at roof edges, which can be related to heat loss and air leakage, although roof ventilation and snow conditions also matter.
If you can see mold or suspect that framing and sheathing are wet, do not cover the area with new insulation. The moisture source should be corrected, affected materials assessed, and the assembly allowed to dry before repairs proceed. Covering a wet wall can turn a manageable repair into structural damage.
Colonial Insulation approaches these issues as building-performance problems, matching air sealing and insulation recommendations to the home or project rather than selling a single material for every condition. That helps owners, builders, and remodelers protect comfort, energy performance, and inspection-ready construction at the same time.
A dry exterior wall is not achieved by one product or one layer of plastic. It comes from a wall that sheds rain, blocks uncontrolled airflow, stays warm enough in winter, and has a sensible path to dry. When those pieces work together, rooms feel more even, heating equipment works less hard, and the structure is better prepared for the next New England season.