
A wall can meet its stated R-value and still leave a new home uncomfortable. In New England, cold-weather air leakage, summer humidity, and missed transitions between assemblies can undermine an otherwise well-built project. Effective new construction insulation planning treats insulation, air sealing, moisture control, and code compliance as one coordinated building-envelope scope – before drywall, siding, and schedule pressure make corrections expensive.
For homeowners, that coordination means steadier room temperatures, lower heating and cooling demand, and fewer surprises after move-in. For builders and remodelers, it means an installation sequence that supports reliable inspections and protects the finished product.
Start New Construction Insulation Planning Before Framing Is Complete
Insulation should be considered during design and preconstruction, not as a finish-stage trade. The plans should identify the thermal boundary, conditioned and unconditioned spaces, wall and roof assemblies, foundation approach, and intended mechanical systems. Those decisions affect material selection, required R-values, ventilation needs, and where the air barrier must remain continuous.
This is especially important when a home includes cathedral ceilings, bonus rooms over garages, complex rooflines, cantilevers, multiple additions, or a mix of exterior claddings. Each feature creates transitions where insulation can be compressed, omitted, or separated from the air-control layer. A clear plan turns those locations into defined details rather than field guesses.
Builders should also coordinate insulation with plumbing, electrical, HVAC, fire blocking, and framing crews. A pipe chase, recessed light, duct penetration, or late framing change can interrupt a carefully planned air barrier. The best time to solve the problem is when access is open and the responsible trades can address it without rework.
Build the Envelope Around Air Control, Not R-Value Alone
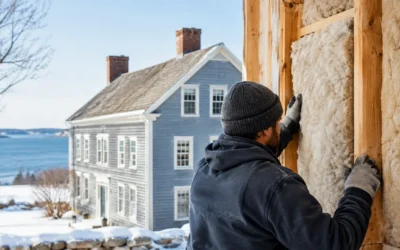
R-value measures resistance to heat flow through a material. It matters, but it does not tell the full story of how a building will perform. Air leaking through gaps around framing, top plates, rim joists, windows, wiring, and duct penetrations carries heat and moisture with it. In a New England winter, that can lead to drafts, cold surfaces, condensation risk, and higher heating costs.
Air sealing should therefore be planned as a defined scope, with responsibility assigned before insulation begins. Common attention points include the sill plate, foundation-to-frame connection, exterior wall penetrations, attic plane, knee walls, rim joists, garage separations, and transitions from wall to roof. These are not minor details. They are often where the building envelope succeeds or fails.
Spray foam can provide insulation and air sealing in a single application where appropriate, particularly at rim joists, irregular cavities, and hard-to-seal transitions. HFO spray foam offers strong thermal performance with a next-generation blowing agent and can be a practical choice where space is limited. It is not automatically the right answer for every assembly, however. Material choice should account for the required R-value, drying potential, budget, fire-protection requirements, and the rest of the wall or roof design.
Select Materials for the Assembly and the Climate
New construction projects often perform best with more than one insulation material. The goal is not to use a favorite product everywhere. It is to place each material where it solves a specific building-performance need.
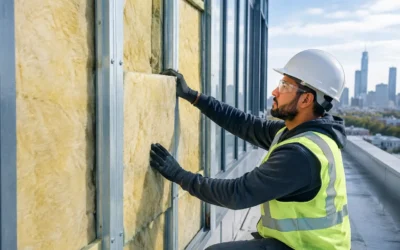
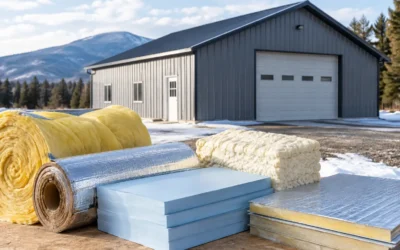
Fiberglass is a cost-effective option for properly prepared wall and ceiling cavities. It performs well when installed at full depth, without gaps, compression, or voids around obstructions. Blown cellulose is well suited to attic floors and enclosed cavities, offering reliable coverage and recycled-content benefits. Mineral wool provides excellent fire resistance, moisture tolerance, and sound control, making it useful in exterior walls, multifamily assemblies, and areas where acoustics matter.
Spray foam is often selected for air sealing, high R-value per inch, and its ability to conform to uneven surfaces. Closed-cell foam can add moisture resistance and structural rigidity in certain applications, while open-cell foam may be appropriate in assemblies that need a lower-density air-sealing material. The right choice depends on whether the assembly needs to dry inward or outward, where vapor control belongs, and how much cavity depth is available.
A hybrid approach is frequently the practical answer. For example, spray foam may seal rim joists and targeted roofline details, while fiberglass, cellulose, or mineral wool insulates larger areas economically. That approach can manage project costs without leaving the most leakage-prone locations to chance.
Do Not Overlook Thermal Bridging
Wood framing conducts more heat than cavity insulation. This is called thermal bridging, and it becomes more significant with advanced framing layouts, steel components, headers, corners, and closely spaced studs. Continuous exterior insulation can reduce this heat loss by wrapping the structure with a more consistent thermal layer.
That decision affects window detailing, siding attachment, flashing, and wall thickness, so it belongs in early design discussions. It may increase upfront complexity, but it can improve comfort near exterior walls and reduce the risk of cold interior surfaces during severe weather.
Plan for Moisture as Carefully as Heat Loss
New England buildings must handle both winter vapor movement and summer humidity. A wall that traps moisture can create conditions for material deterioration, mold growth, and indoor air concerns. Proper moisture planning considers bulk water, air leakage, vapor diffusion, and drying potential together.
Bulk water must be controlled first with sound roofing, flashing, drainage planes, and foundation waterproofing. Insulation cannot correct a leaking wall. Once rain control is addressed, air sealing helps limit the movement of moist indoor air into cold cavities, where condensation can occur.
Vapor retarders and vapor barriers require an assembly-specific decision. Their placement varies based on insulation type, exterior continuous insulation, cladding, and local code requirements. Installing a low-permeance material in the wrong location can limit drying and create a problem that is difficult to see until damage has occurred. This is one reason a climate-aware insulation contractor should review the full assembly rather than prescribe a single product by habit.
Below grade, foundation walls and slab edges deserve the same attention. Insulating basements and crawl spaces correctly can make first-floor rooms warmer, reduce condensation potential, and create a more usable, durable lower level. The choice between insulating the floor above, foundation walls, or crawl-space perimeter depends on whether that space will be inside the conditioned enclosure.
Coordinate the Work With Inspections and the Construction Schedule
Insulation is installed late enough that multiple trades have already altered the shell, yet early enough that drywall can quickly conceal defects. A dependable process includes a pre-insulation walkthrough after rough mechanical, electrical, and plumbing work is complete. At that stage, the installer can identify open penetrations, missing blocking, unsealed top plates, framing defects, and areas that need protection before insulation is placed.
The inspection sequence should be understood at the start. Local requirements in New Hampshire, Massachusetts, Maine, and Vermont can vary, and the applicable energy code may set expectations for R-values, air sealing, vapor control, and documentation. Builders should avoid assuming that a familiar detail will satisfy every jurisdiction or project type.
A blower door test, whether required or performed as a quality-control measure, is most useful when there is still time to correct leakage. Testing before finishes are complete provides actionable information. Waiting until a final inspection leaves fewer practical options and can delay occupancy.
For commercial and multifamily work, coordination becomes even more critical. Fire-rated assemblies, sound-control requirements, shaft walls, exterior insulation continuity, and compartmentalization between units must align with the project drawings and inspection standards. A missed detail can affect more than energy performance.
Make Comfort and Mechanical Design Part of the Same Conversation
A tight, well-insulated building reduces heating and cooling loads. That is good news, but it also means HVAC sizing should reflect the finished envelope. Oversized equipment can short-cycle, waste energy, and manage humidity poorly. Under-designed ventilation can affect indoor air quality once uncontrolled leakage is reduced.
Insulation planning should therefore include communication with the HVAC designer or installer. Ducts and air handlers located within conditioned space are generally easier to protect from energy loss than equipment placed in vented attics or unconditioned garages. Where ducts must cross the thermal boundary, their penetrations need deliberate sealing.
Homeowners should not have to choose between efficiency and fresh air. A tighter home needs intentional ventilation, not accidental drafts. The appropriate approach depends on the home’s size, occupancy, mechanical design, and applicable code.
A Better Pre-Insulation Conversation
Before work begins, confirm the target R-values, insulation materials, air-sealing scope, vapor-control approach, attic or roofline strategy, and any sound or fire-resistance requirements. Review who will seal penetrations, when rough-in work is considered complete, and when inspections or blower door testing will occur. These answers keep the insulation scope aligned with the actual building rather than a generic allowance.
Colonial Insulation helps builders and property owners make those decisions with New England weather, local requirements, and real installation conditions in mind. A clear site review and written scope can prevent the small omissions that become permanent comfort complaints.
The best time to protect a building’s comfort, efficiency, and durability is while its framing is still visible. Plan the envelope early, verify the details before insulation goes in, and give the finished home a better chance of performing as well in February as it does on move-in day.